
This Article describes how to install your WWII Jeep fuel tank, sending unit, and straps. Also shows a modificiation on adding a fuel filter. Applies to 1942,42,1943,43,1944,44,1945 Jeeps models


|
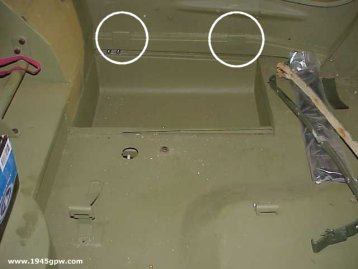
1. Installing the fuel tank is pretty easy, but the fuel tank straps can be difficult to find. Here we show you the empty tank well prior to the installing of the tank. Circled are the channel hooks that the straps will connect to. |
|
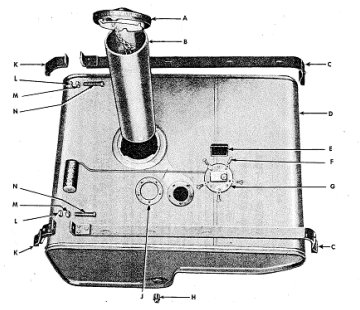
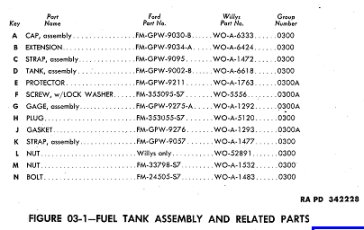
2. If you look at the components of the fuel tank, there aren't very many pieces. The filler tube can be a little challenging to locate an original one. |
|
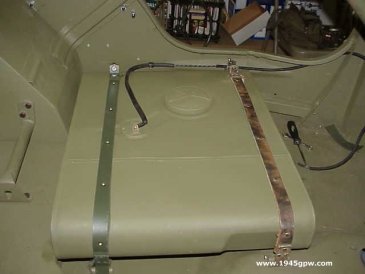
3. Installing the tank is pretty simple, first just place the tank into the tank well. Then lay your tank straps in the position they will go. |
|
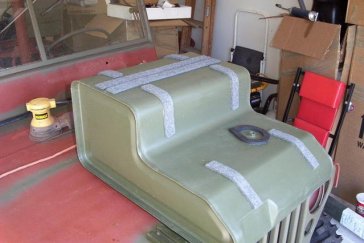
4. Before installing the fuel tank, flip the tank over and install some padding. There are different ways to do this. G503.com sells thin anti-squeek strips, here you see that a thin strip of Felt will protect the metal on metal rubbing that can occur. This was the example shown by Randy K. on the G. |
|
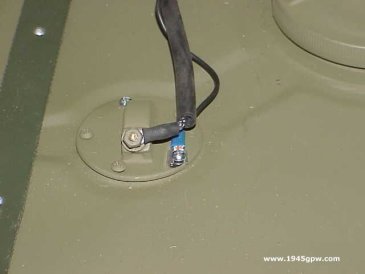
5. Before installing the straps, you can install the sending unit into the tank. Just drop the sending unit into the small hole on top of the tank and screw into the tank. |
|
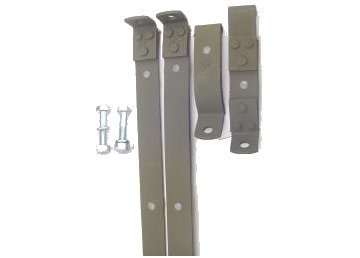
6. There should be four tank straps an a pair of nut and bolts for the strapping in of the tank. Original straps can still be found at swap meets or ebay, and there are repo sets available as well. The straps have a padding under them so they don't damage the tank. |
|
7. Now install your straps from the channel hooks in the side panel across the tank to the floor hooks. You may need to extend the bolts out as far as they will go in order to line up. Once you have them on, tighten down snug, but not hard as you can dent the thin wall tank. |
|
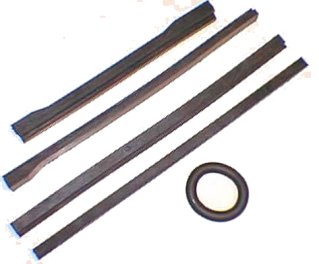
8. After your tank is installed, to protect the tank from debris falling into your tank area, you should install these tank seals. Depending on your tank and well configuration, they seals will sit snug or be a bit loose. Never the less they can help debris falling into your tank area. The circular seal goes under the tank at the hole in the floor for the fuel line connection. The others go around the Tank well after the tank is installed. |
|
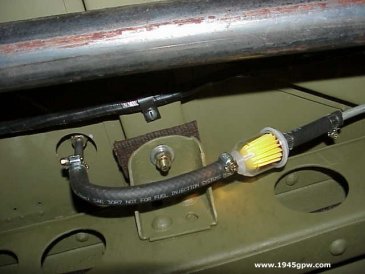
9. (Optional MOD). If you follow your fuel lines back to your tank you lines should marry up to the brass fittiing on the tank. Here you see a simple modification of adding an out of site fuel filter. Clear so you can see the sediment to change, but out of the way when people look at your engine. |

|
10. In order for the fuel gauge to read properly the sending unit must be grounded well. On the side panel you should have a clip there for routing your line to the fuel gauge. If you remove the paint and send your ground wire to this panel you should get a good ground. |
